
A cheaper model isn't really "cheaper"
As of September 2026, cutting-edge models like GPT 6 Astra and Fable 5.1 are the subject of plenty of debate, but if you don't have much app-building experience and you're on the fence, just go with ChatGPT for now. This article assumes you're building an iPhone app on a Mac, so please install the ChatGPT app for Mac ahead of time.
Once ChatGPT is ready, all that's left is to hand it a prompt and let it build your app — but here's where a question comes up: which plan, and which model, should you use?
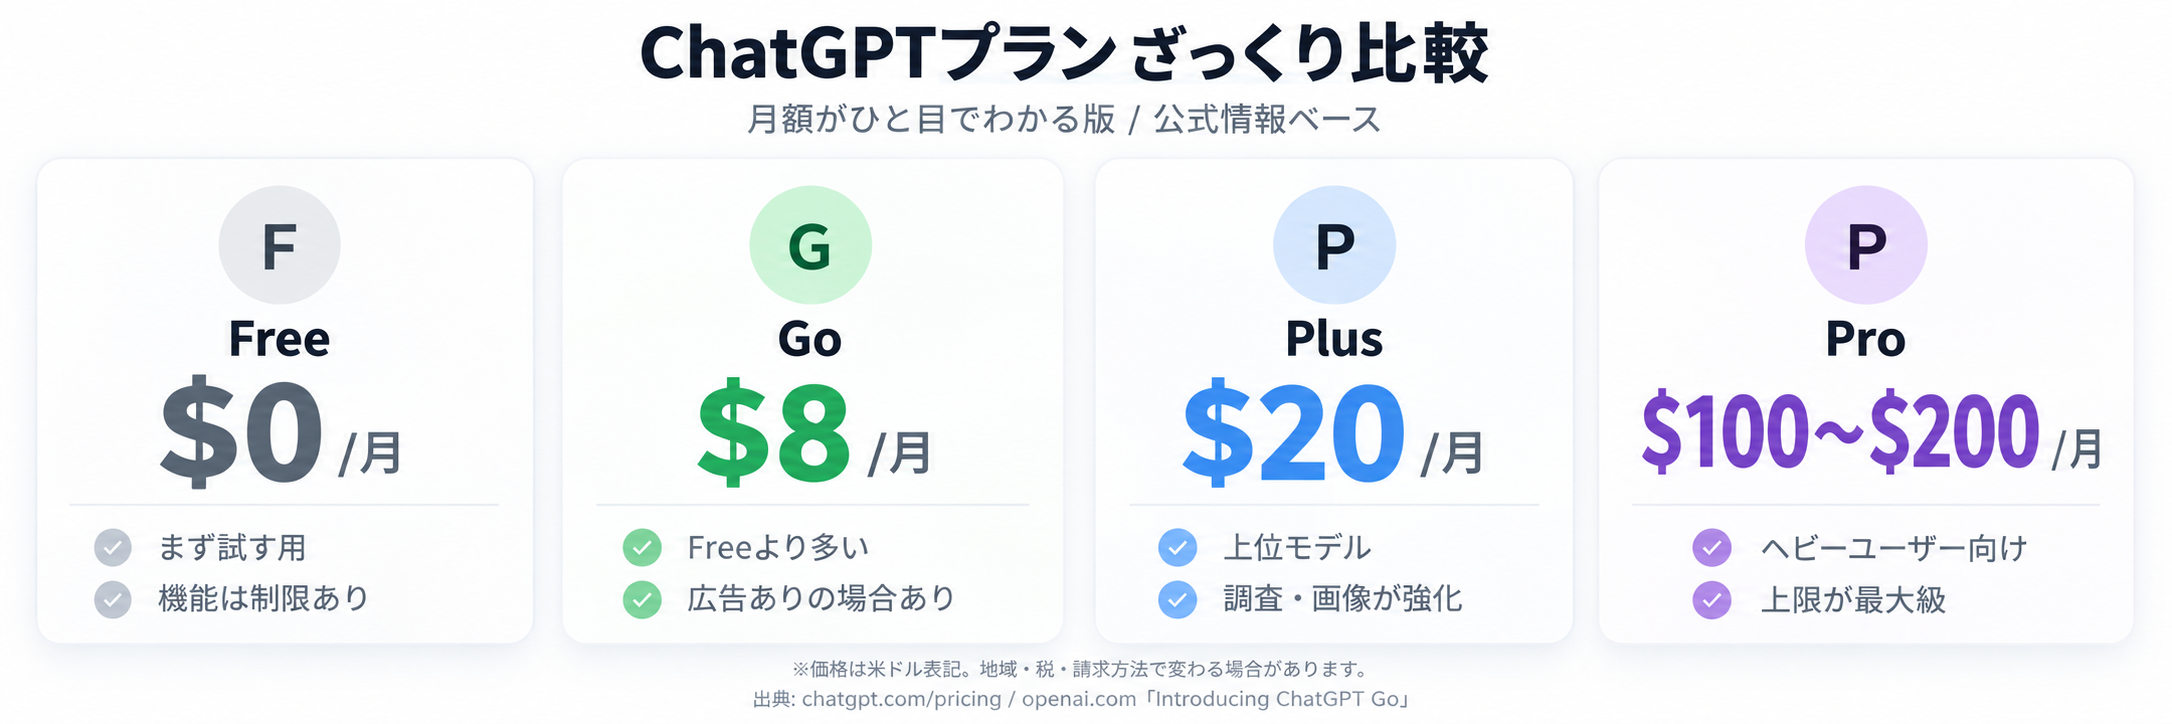
Pay for the Pro plan only during the month you're building
Let's cut to the chase: to really build out an app, the $100/month Pro plan is essential. That said, you don't need it all the time. Depending on your specs, if you focus, you can get the broad outline of a single app finished in just a few days. From there you'll adjust and refine as you test usability, so you can probably have a finished app in about two weeks. On the $20/month Plus plan, you'll likely hit usage limits while building out that first version, and the work won't go smoothly. So the smart move is to upgrade to Pro the moment you decide, "Okay, I'm building this app," and then use GPT to your heart's content for that one month. Once the app is more or less done and only minor tweaks remain, you can drop back down to Plus.
If you want to economize further, another option is to start on the $20 Plus plan and, when you hit the hourly or weekly limits, buy "credits" to cover just the shortfall. It's a strict pay-for-what-you-use approach, but you'll constantly have to keep an eye on your token usage, so personally I don't recommend it.
Use the top-tier model whenever you can
Every model family comes in several tiers, from inexpensive entry-level options to pricier flagship ones. With GPT, going from the bottom up, there's Luna, Terra, Sol, Astra, and so on — and my recommendation is to always use the top-tier model.
If you reach for a lower tier to save tokens, it may not follow your instructions properly or may introduce bugs, and you'll end up with a long string of follow-up instructions that drives your total token usage up anyway. If you have an engineering background, you can judge when a task is simple enough for a lower-tier model, but that's hard to do without that experience — so just stick with the top model.
"High" reasoning is plenty
Reasoning level, on the other hand, is something I'd like you to choose thoughtfully. For the GPT "model," we'll use GPT 6 Astra — and with Astra specifically, if your prompt is solid, "High" is plenty. You can certainly use the more token-hungry Xhigh or Max settings, but they consume a lot more tokens without producing results that differ much from High. This too comes down to your prompt, but I recommend making High your default to start.
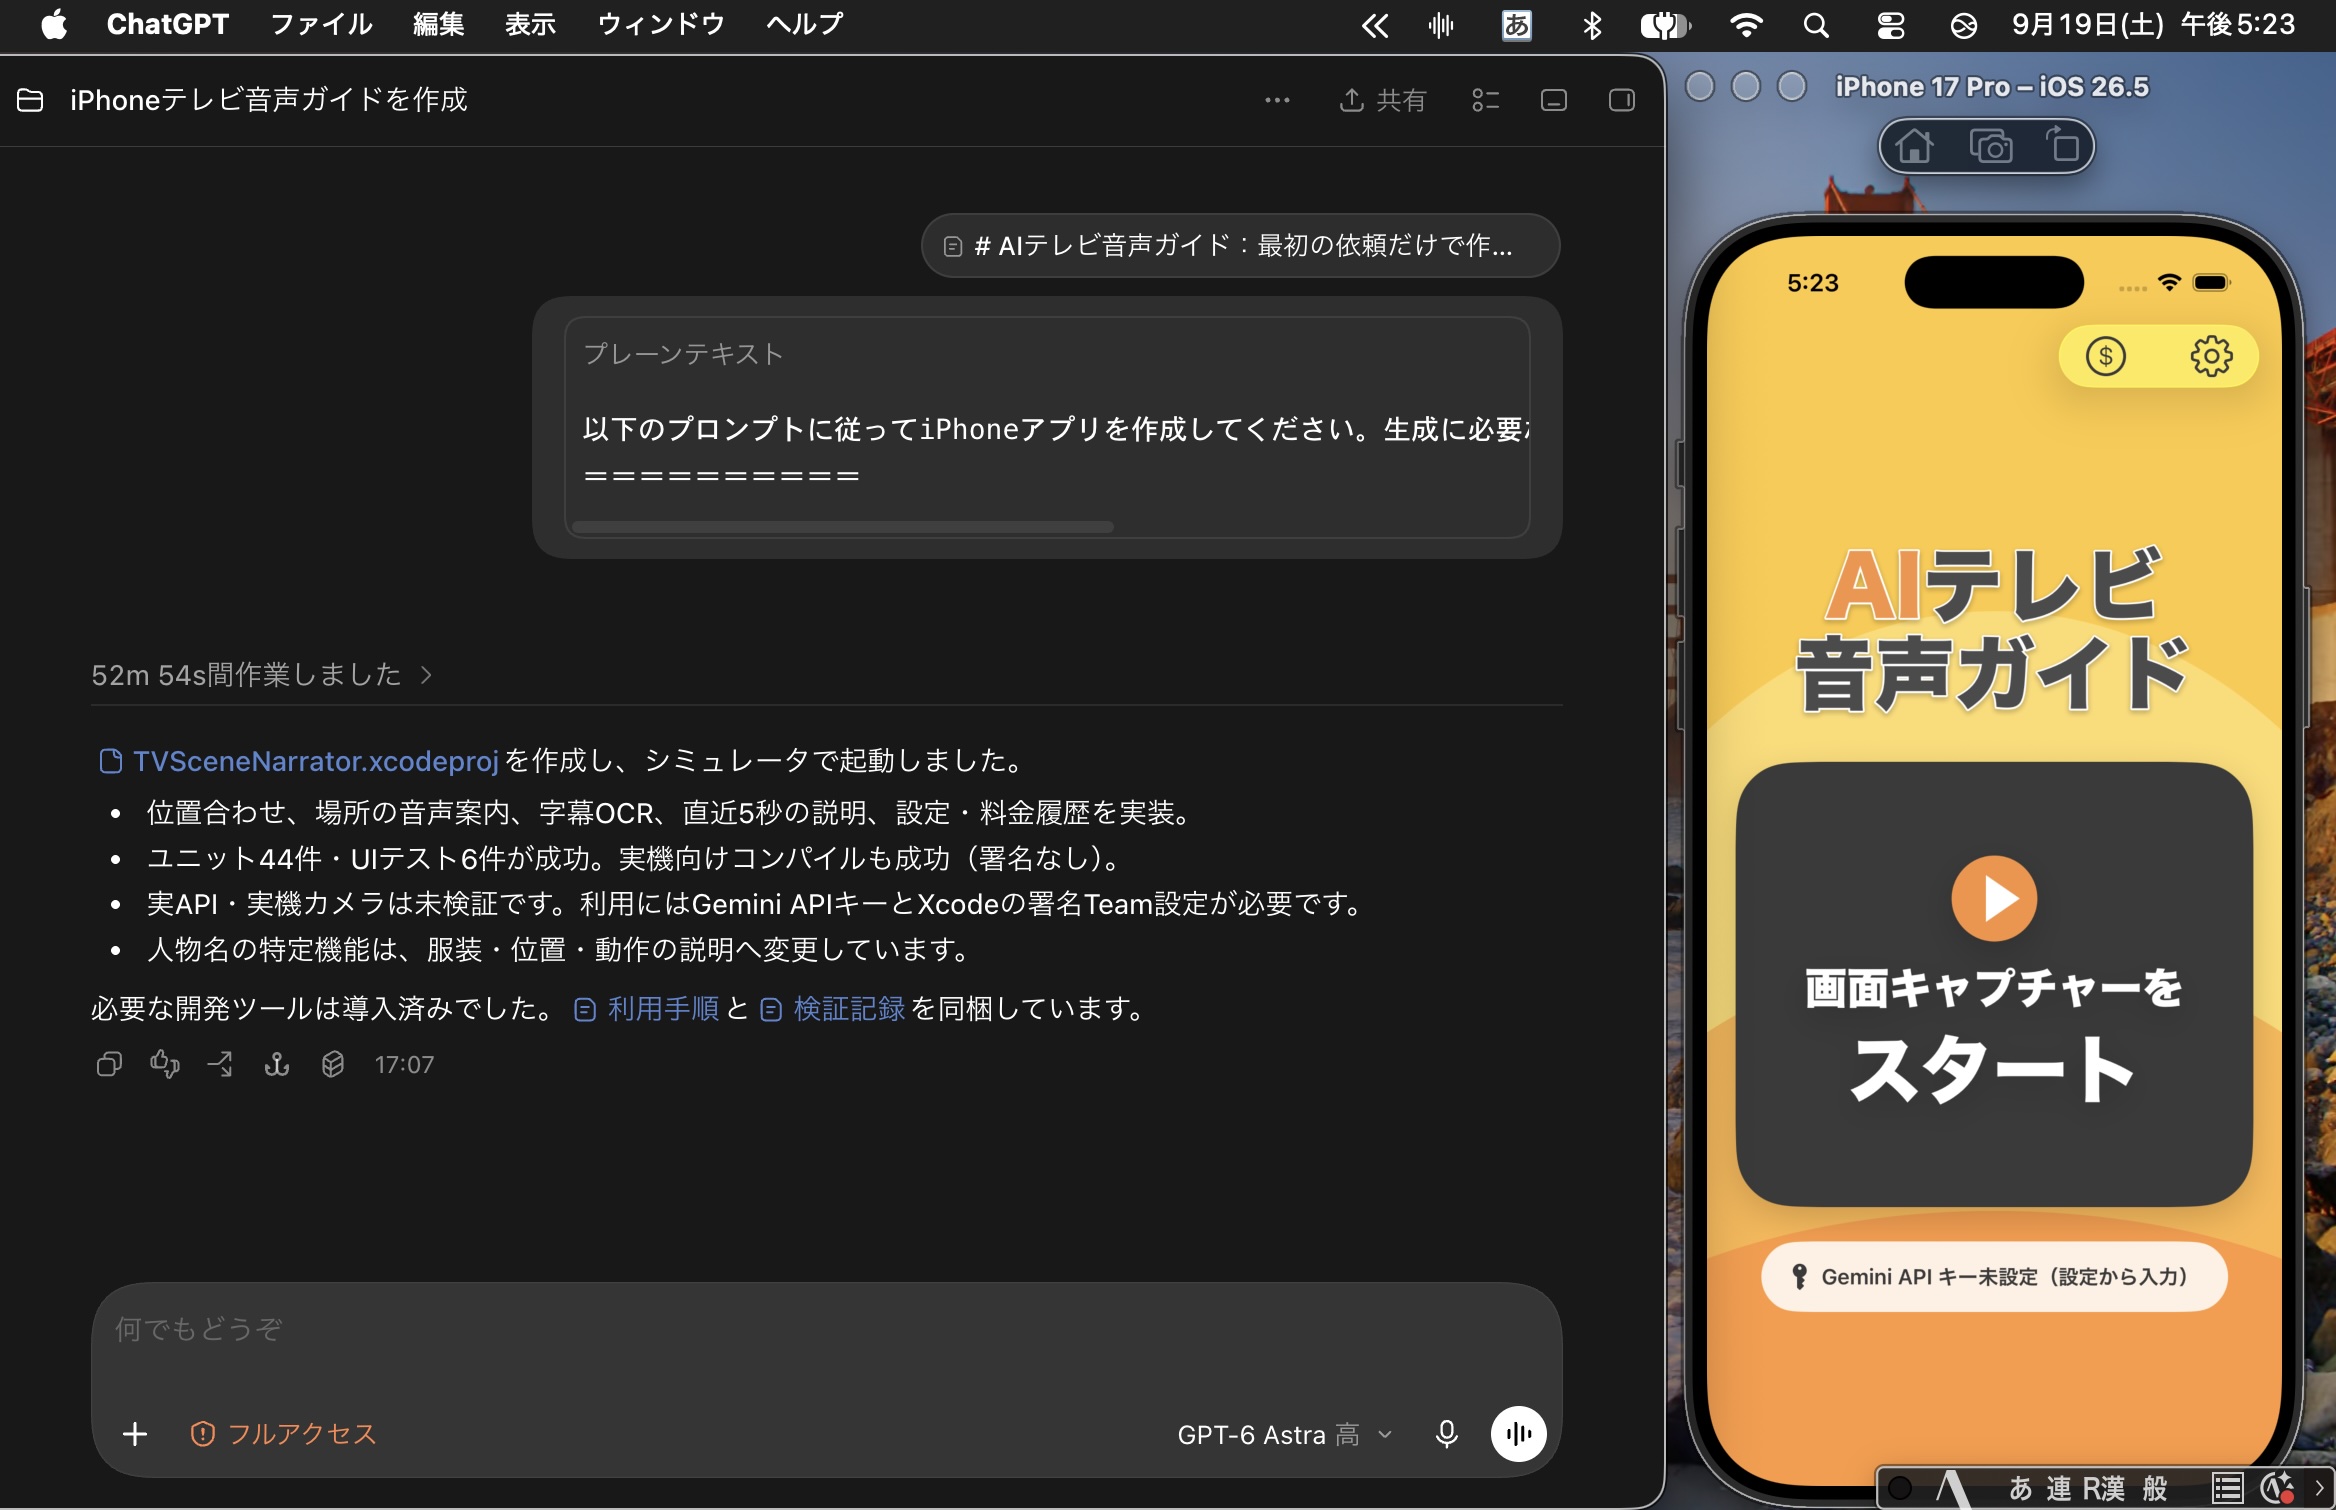
Time to hand over the full prompt
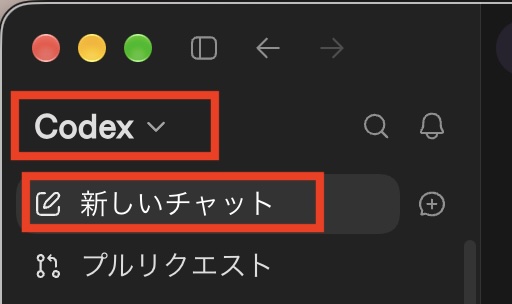
Step 1: Start a new chat in Codex
In the upper left of the ChatGPT app, select Codex, then click "New chat" just below it to begin a new session.
Step 2: Specify your project folder
Create a folder somewhere to hold all of your app's code and related files in one place. Then click "Select project," click "New project" at the bottom of the menu that appears, and choose the folder you just created.
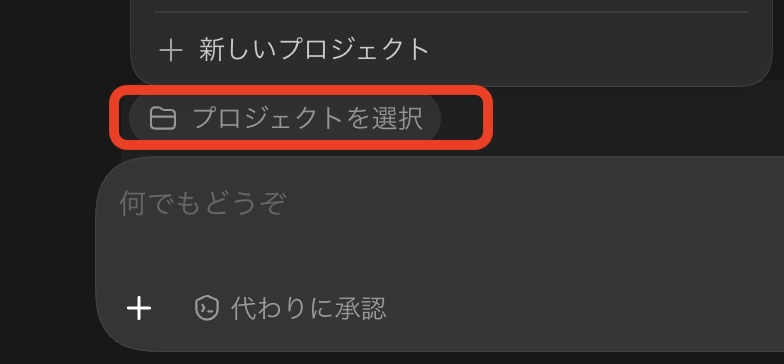
Once selected, the project folder's name is displayed there, so you can tell at a glance which project folder you're currently working in.
Step 3: Choose your model, reasoning level, and access mode
Finally, choose the model you'll use for this session. Set the model and reasoning level to the right of the prompt input field. One more important thing: you need to specify what level of access the AI has to your computer. Since we're letting it handle everything, including installing Xcode, choose "Full access" here. You'll see a warning, but go ahead and allow it.

Step 4: Set up the prompt
Now, enter the long prompt for building the "AI TV Audio Guide" app introduced in Part 3, as shown below. The long prompt alone would work, but in case Xcode and other development tools aren't installed on your Mac, we'll add an instruction up front so the AI installs whatever is needed.
Then copy the long prompt from Part 3 (there's a copy button in the upper right of the prompt — use that) and paste it where indicated by the line.
Please build an iPhone app following the prompt below. Install any apps or tools needed to generate it.